After installation, the plugin settings screen can be found under Marketing -> JETT Mailchimp e-Commerce.
Settings
The settings screen looks like this:
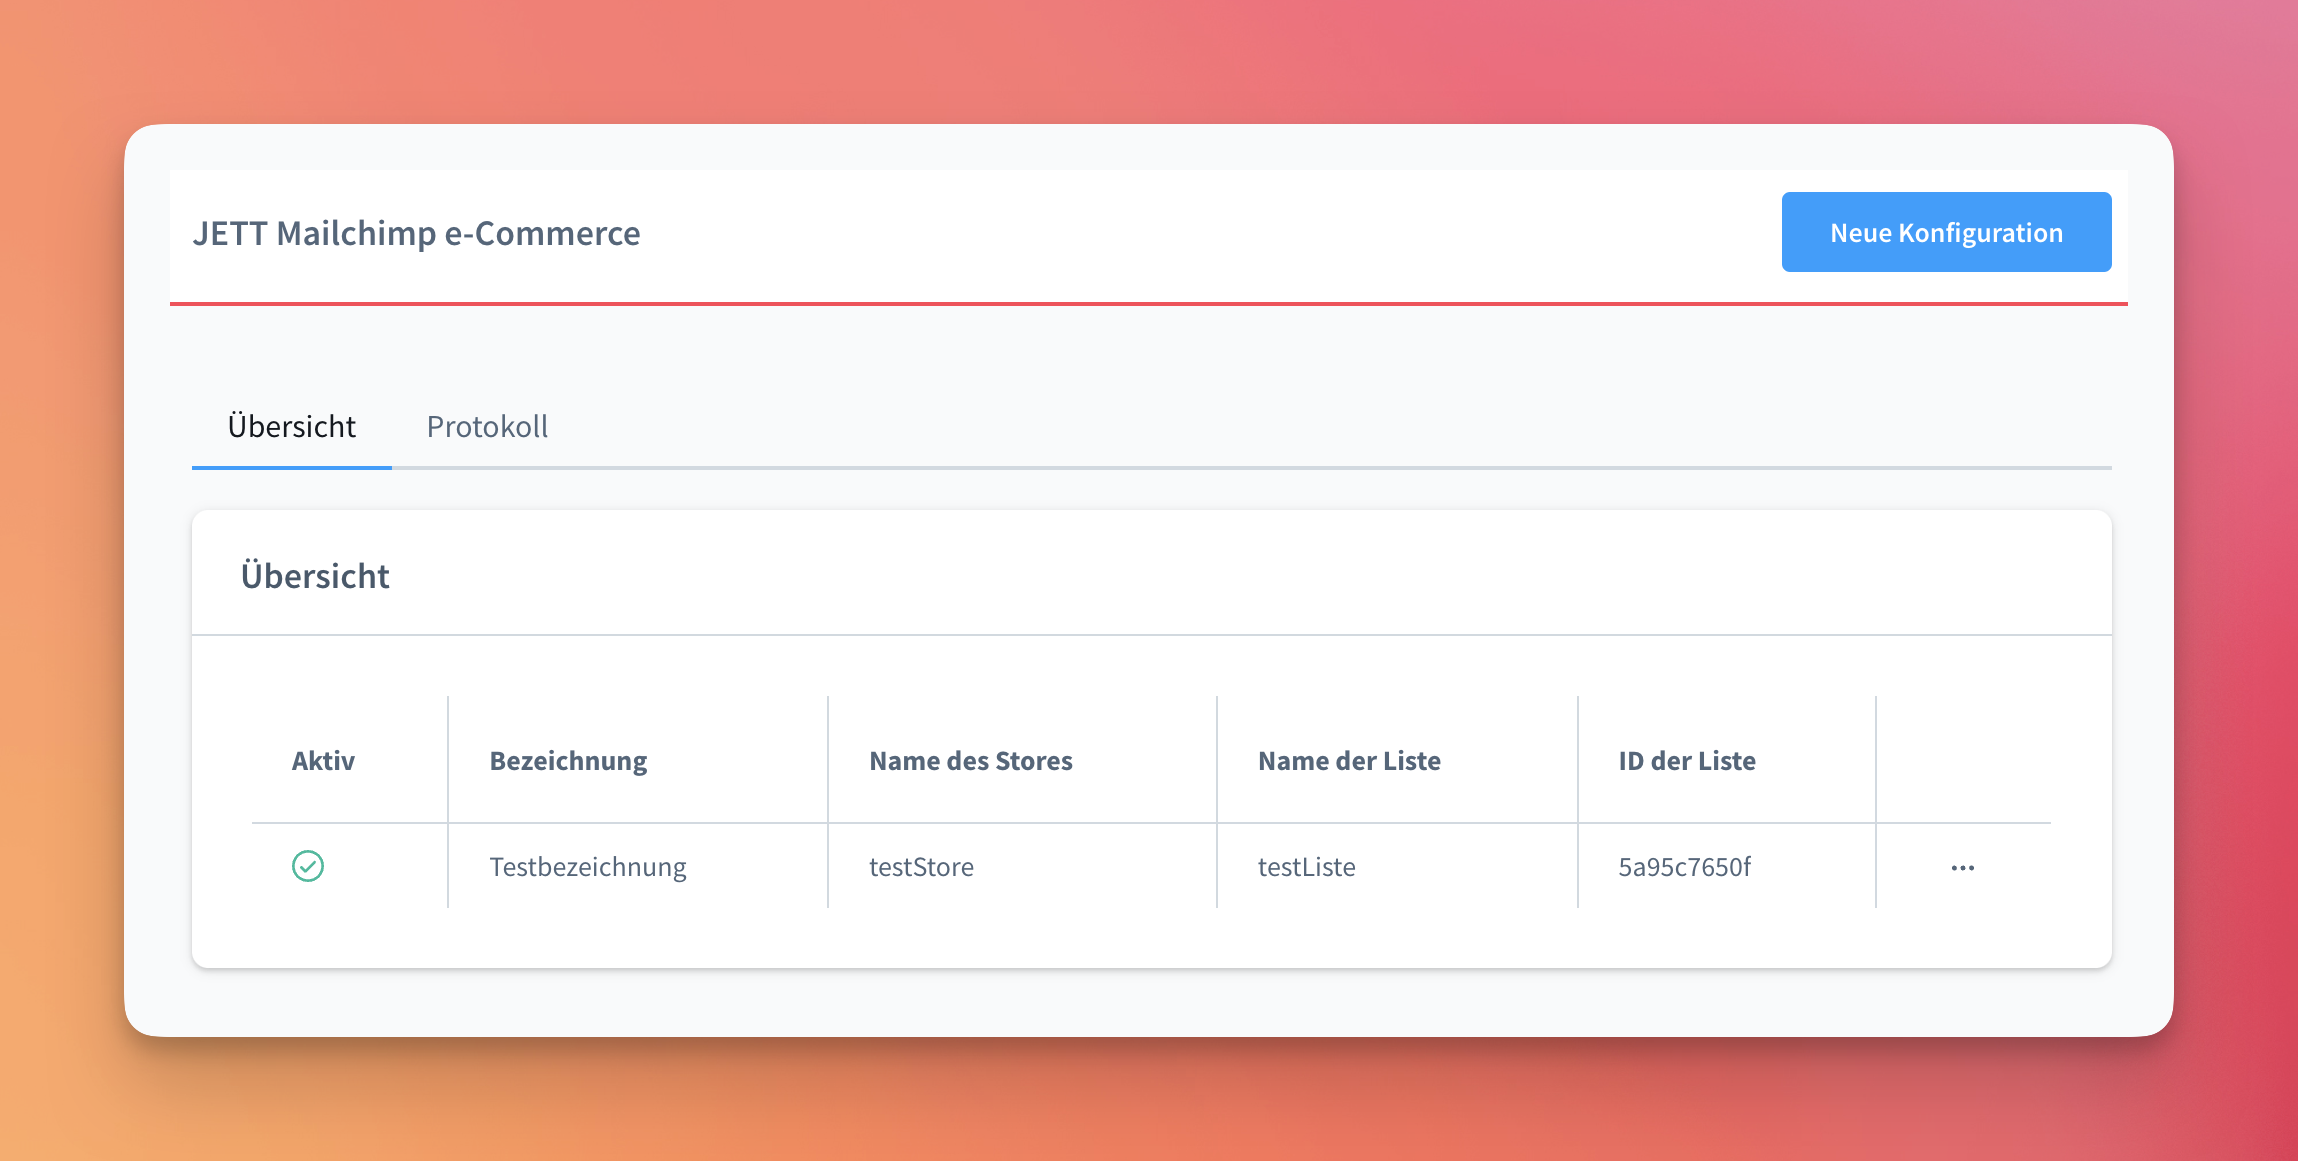
The overview shows all available settings options. The name is freely assignable in the settings, and the table also provides information about which list is connected.
A new configuration can be created using the button at the top right.
The three dots on the far right of the table take you to the details of a configuration.
Store
When starting a new configuration, a corresponding store must be created, which is registered by the plugin with Mailchimp. First, give the configuration a name and select the appropriate sales channel that should apply to the configuration.
Once the sales channel has been selected, the corresponding domain and language must be selected. Once this is done, the mask looks like this:

Next, you need to create a store by entering the following information:
-
API key: Your API key from Mailchimp. You can find this under Account -> Extras -> API Keys.
-
List: Once the API key has been entered, the list to be used for store synchronization can be retrieved and selected.
-
Store ID: Your store is listed under a store ID at MailChimp. Enter your own store ID here—this can be called “myStore” or something similar, for example, and should not have been used before and should not contain any special characters.
-
Name: A descriptive name for the store, similar to the store ID.
-
Currency code: Which currency code is used in your shop? e.g. “EUR”
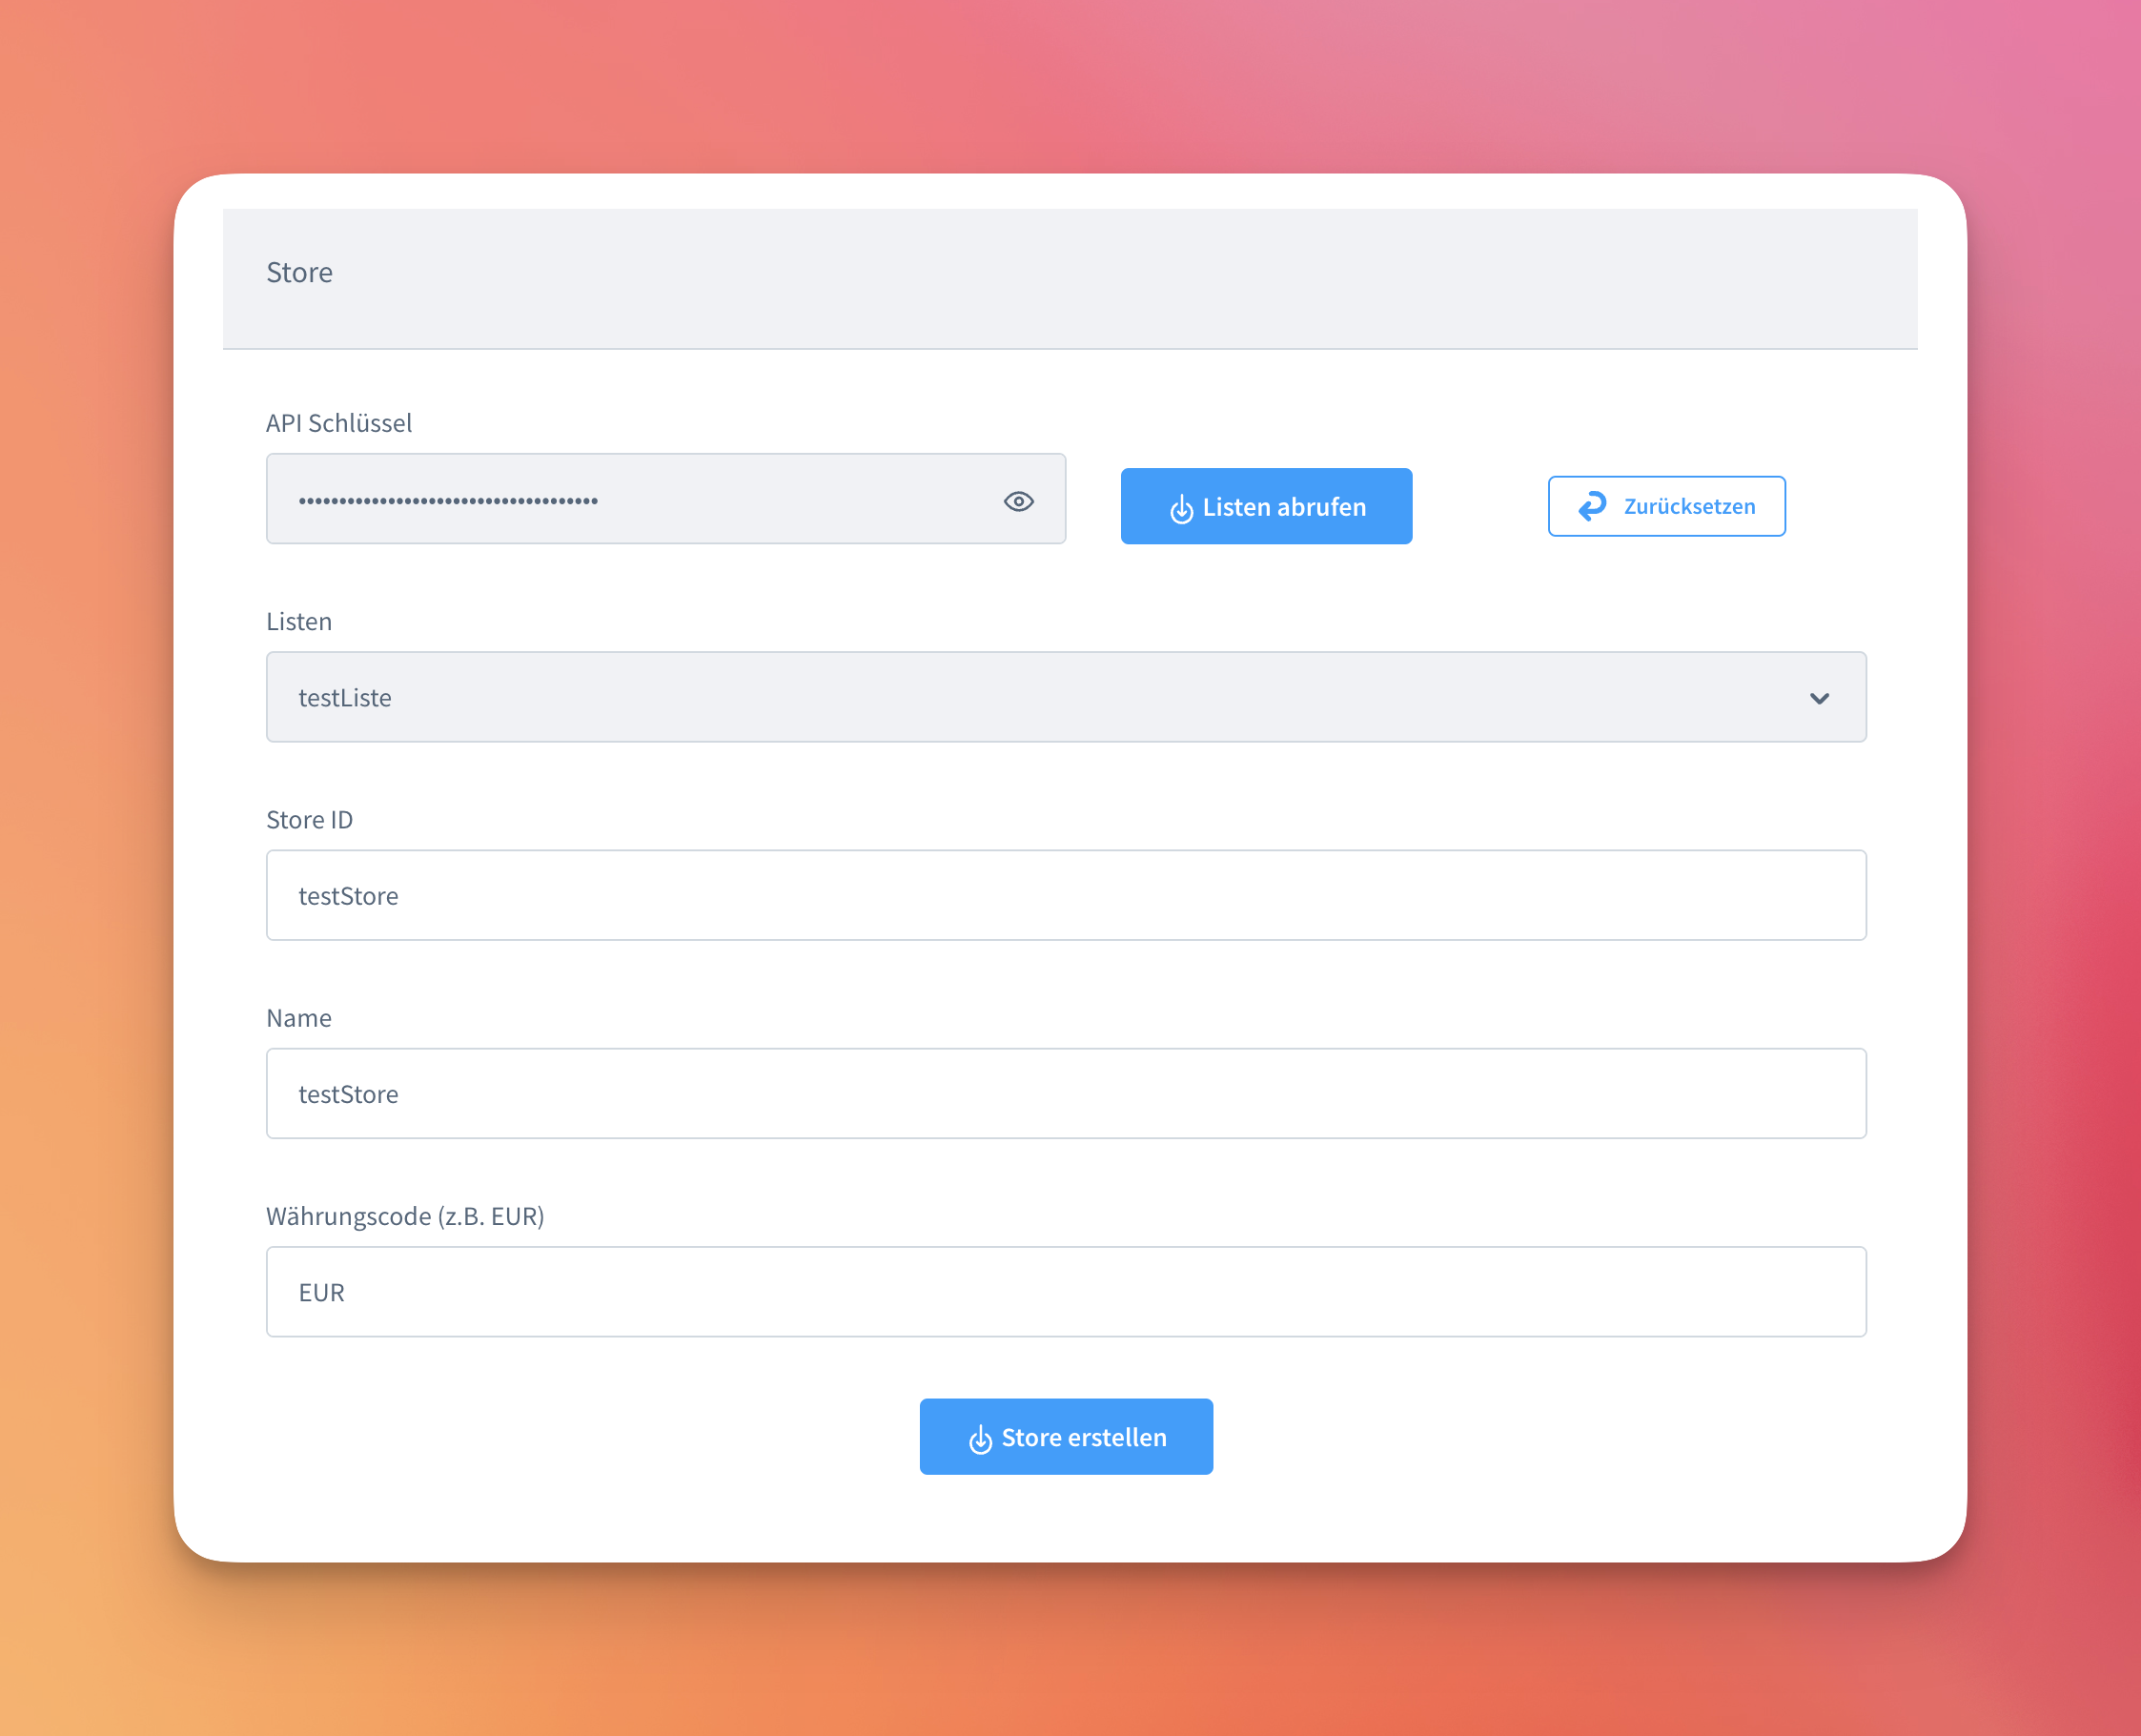
The store can then be created by clicking the “Create store” button.
Store is connected
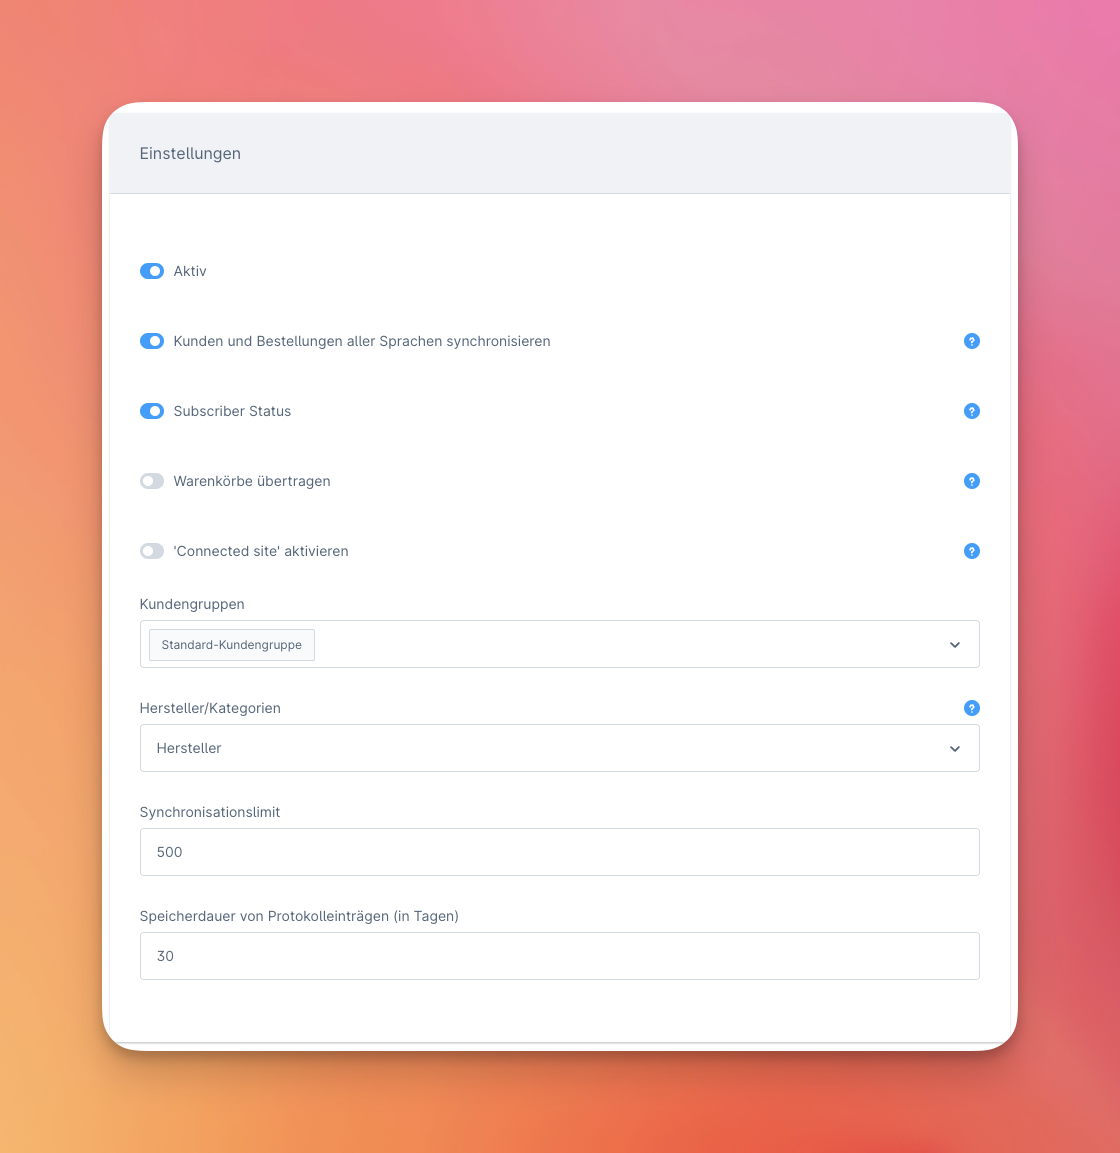
Once the store has been created, further settings can be configured:
-
Active: Is synchronization enabled or disabled for the corresponding sales channel?
-
Synchronize customers and orders of all languages: If this option is enabled, customers and orders of all languages will be synchronized. If the setting is deactivated, only customers and orders that correspond to the selected language will be synchronized.
-
Subscriber status: Decide whether your customers should be added as subscribers. If the customer is added as a subscriber, they can be used for campaign targeting. If not, the customer's email address can be used for transactional emails. Further information can be found here (Infolink).
-
Transfer shopping carts: If this option is enabled, temporary shopping carts are transferred to Mailchimp and can be contacted with an abandoned cart campaign.
-
Activate ‘Connected Site’: When a store is created in Mailchimp, the corresponding domain is registered as a Connected Site. With this setting activated, a corresponding code snippet is inserted into the Shopware installation when the visitor has accepted the corresponding cookie in the Cookie Consent Manager.
-
Customer groups: Defines whether orders and customers of certain customer groups should be synchronized.
-
Manufacturers/categories: Mailchimp only has one data field for products, called ‘vendor’. This option is used to decide which value should be transferred to the corresponding field.
-
Synchronization limit: Defines how many records should be synchronized with a synchronization run. In case of problems/weaker servers, a lower number can help.
-
Storage duration of log entries: Synchronization runs are recorded in the log. This defines how long the entries should be stored.
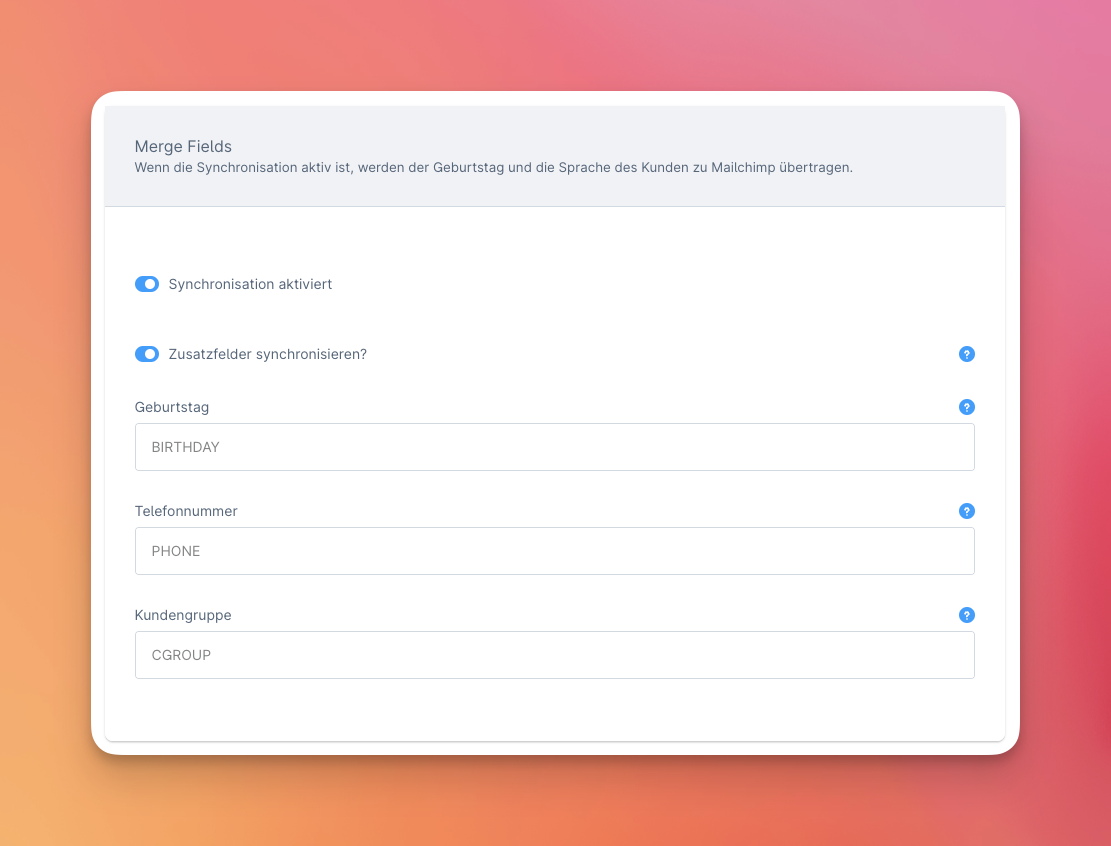
Merge Fields
Additional attributes can be transferred to corresponding merge fields. Currently, the plugin offers synchronization of the following attributes:
-
Birthday: Customers' birthdays can be synchronized to a merge field. To do this, the name of the defined merge field must be specified here. Important: The format of the merge field must be ‘Birthday’ and ‘MM/DD’ in Mailchimp.
-
Phone number: The customer's phone number can be synchronized into a merge field. To do this, the name of the defined merge field must be specified here. The phone number of the default billing address is always used.
-
Customer group: The customer's customer group can be synchronized into a merge field. To do this, the name of the defined merge field must be specified here.
In addition, additional fields (custom fields) can be defined for the customer in Shopware. The option in the plugin allows the additional fields for the customer to be transferred as a merge field. The technical name of the additional field is transferred to Mailchimp in uppercase letters as a merge field. All characters except A-Z and 0-9 are replaced. If the additional field is defined as ‘zusatz-feld’, it is transferred as ‘ZUSATZFELD’. The list in Mailchimp must be prepared accordingly so that the values are transferred.
Tip: If you have a merge field in the linked list that is named ADDRESS and is of the data type “ADDRESS”, the customer's default billing address is automatically stored in this merge field.
Tip #2: If you have a merge field in the linked list that is named COMPANY and is of the data type “TEXT”, the customer's company (if available) is automatically stored in this merge field.
Tip #3: If customers are transferred to Mailchimp and the first and last names of the customers are to be transferred to the subscriber, the merge fields for first name and last name should be left at the default setting FNAME (for first name) and LNAME (for last name).
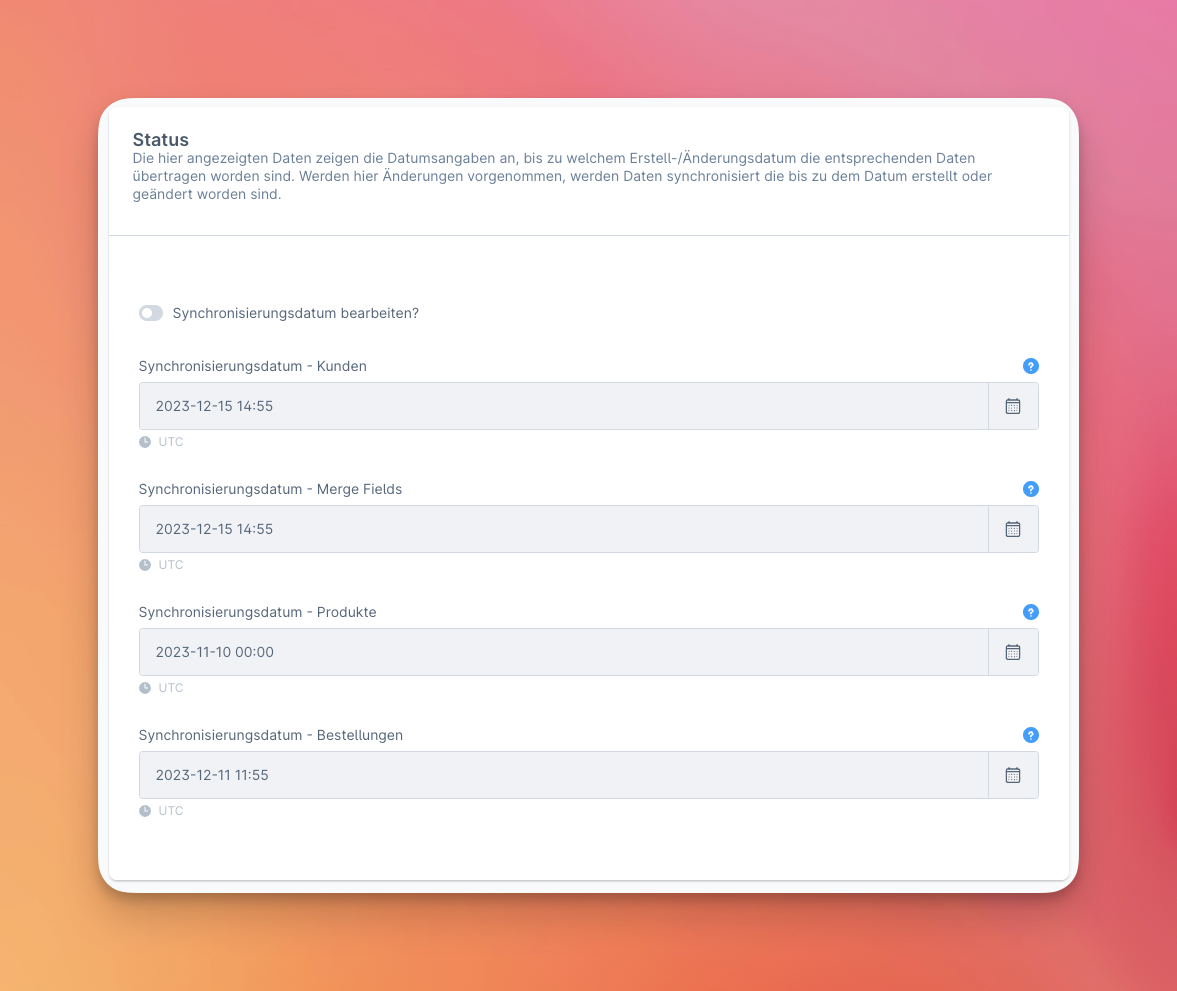
Status
The data shows the dates up to which the corresponding data has been transferred. If changes are made here, data created or changed up to that date will be synchronized.
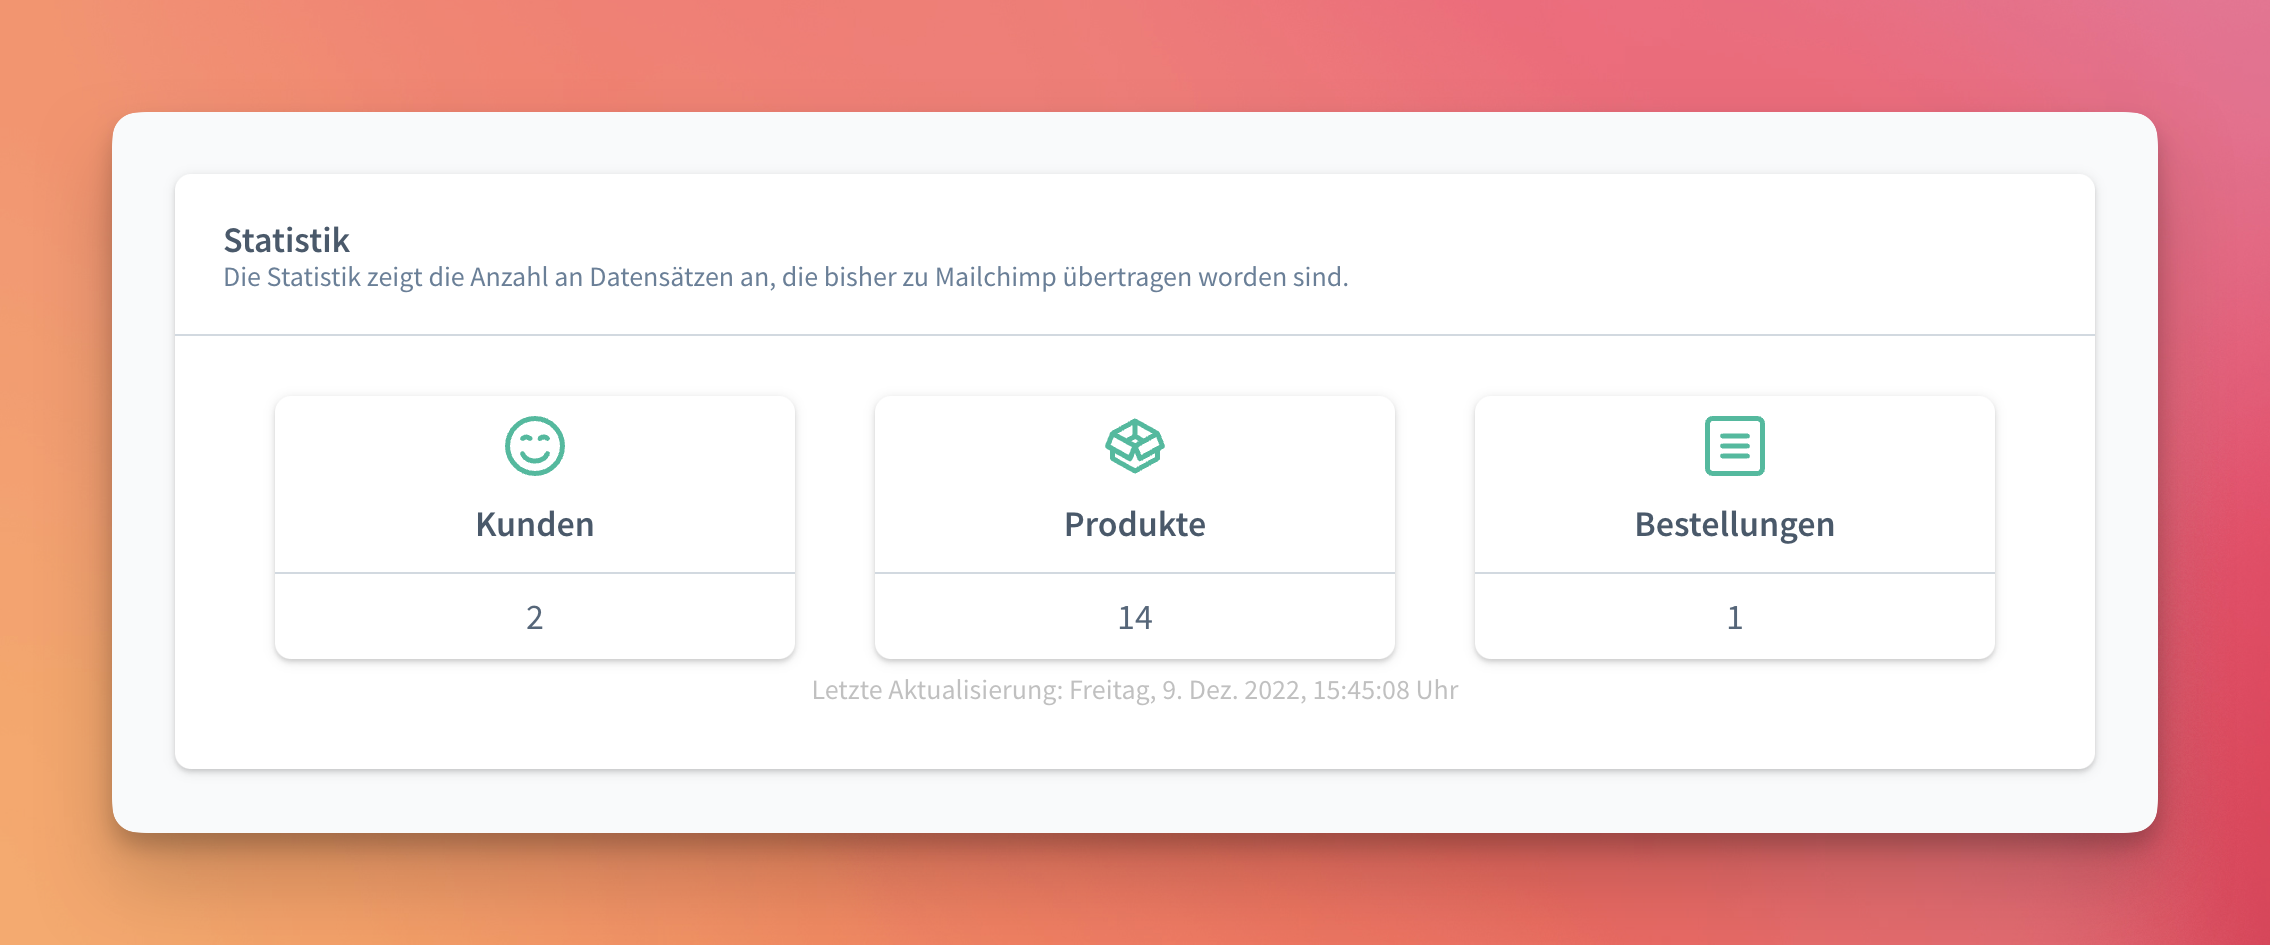
Statistics
Once the configuration has been completed and synchronization has begun, statistics on the elements that have already been synchronized are displayed above the settings: